
How to make an ash pottery glaze from fallen leaves
Did you know that plant leaves, just like any other part of a plant, can be burned to create ash, and that this ash can be used as an ingredient in pottery glazes?!
In fact, it is thought that Potters have been using plant ashes in pottery glazes for at least 3500 years!
Experimenting with different plant ashes in glazes is one of my favourite things to do in pottery. Throughout my experiments, I discovered that it is often the leaves of plants, rather than the wood or stems, that create the most beautiful pottery glazes.
The more I experimented with ash glazing, the more I realised the amazing potential of using fallen leaves, shed naturally by plants, in pottery glazes.
Unlike many other materials used to make pottery, the ash created by fallen leaves is sustainable and renewable. Leaves are continuously created by plants, are abundant, and can be locally sourced. Using leaf ash in pottery glazing reduces the dependence on mined pottery materials extracted from the Earth and transported internationally.
I put all my experiments glazing with fallen leaf ash in this book: Leaf Ash Glazing: A Guide to Sustainable Pottery Glazing with Fallen Leaves

This blog post is an extract from the book Leaf Ash Glazing: A Guide to Sustainable Pottery Glazing with Fallen Leaves
What is leaf ash glazing?
When naturally fallen plant leaves are dried and burned, they create a fine ash that can be used as an ingredient in pottery glazes. Leaf ash glazing involves creating a pottery glaze from the ashes of burned leaves along with other glaze-making ingredients such as crushed rocks, clays and water.
Any leaf can be used in ash glazing and amazingly, each type of leaf creates a totally unique pottery glaze. The proportion of ash used in pottery glazes can vary, ranging from 6% in some recipes and to up to 50% in others.
It is thought that ash glazing originated in China 3500 years ago during the Shang dynasty. Potters in this region invented a new type of pottery kiln called the cross-draft kiln which allowed them to fire up to temperatures of 1200°C for the first time.
Cross-draft kilns were heated by burning wood, and it is thought that some ash from the wood fell onto pots and melted in the high temperatures. Potters noticed the melted wood ash had created a glaze-like finish on the pots, so they began mixing plant ash with clay and applying it to the outside of pots to make a pottery glaze.
From that point onwards wood ash was used extensively in pottery glazes in China, Korea, Japan and Thailand. Ash glazing was also practised in Egypt and Iraq where the ash from desert plants was mixed with Copper compounds to give richly coloured turquoise blues in pottery glazes.
Inspired by the ash-glazed pottery in Japan, the Potter Bernard Leach began using ash glazes in his work during the 1920's. Other potters who became well-known for creating ash-glazed pottery include Phil Rogers, Jacqueline Lerat, Norah Braden, Gwyn Hanssen Pigott and Katherine Pleydell-Bouverie.
In fact, Katherine Pleydell-Bouverie‘s work has been described as the most thorough investigation into ash glazes in modern times. Pleydell-Bouverie’s glaze testing notebooks with over 500 recipes in total can be viewed at The Crafts Study Centre in the UK.
How does ash glazing work?
Plant ash contains the perfect combination of glaze-making minerals. As plants grow, they store Calcium, Silica, Potassium Oxide, Magnesia, Phosphorus Pentoxide and Sodium, naturally in their tissues. When dried leaves, or, in fact, any part of a plant is burned, these minerals are released into ash and can used as an ingredient in a pottery glaze.
Plant ash also contains trace metals such as Titania, Vanadium, Copper, Chromium, Iron and Magnesium. These trace metals act as colouring oxides in ash glazes, naturally producing subtle shades of cream, grey, blue, brown and green.
A pottery glaze can be made from any plant ash because all plants contain these essential glaze-making minerals in their tissues. Each plant has a completely unique mixture of minerals and trace metals. Even plants that are the same species but growing in different soils, or under different climatic conditions can have a unique mineral and trace metal combination in their ashes, and therefore create different-looking pottery glazes.
Different parts of the same plant can also contain different concentrations of minerals and trace metals. The leaves of plants for example, often contain more naturally occurring trace metals than other parts and can create the most unique, and beautifully coloured pottery glazes.
How to make a pottery glaze from fallen leaves.
In the book Leaf Ash Glazing: A Guide to Sustainable Pottery Glazing with Fallen Leaves, I take you through the simple step-by-step process to make your own beautiful stoneware pottery glazes from leaf ash. From identifying and collecting leaves and processing them into ash, to creating unique high-fire leaf ash glazes – it's achievable even if you've never made a pottery glaze before!
Safety when ash glaze-making.
Why it is essential to wear an FFP3 face mask when glaze-making.
Silicosis is a serious health condition caused by breathing in silica dust over a long time. Many ingredients in pottery glazes, such as crushed rocks and clays, contain silica dust, so it is essential to properly protect your lungs during the glaze-making process.
The Health and Safety Executive in the UK recommends wearing an FFP3 face mask when working with silica dust. FFP3 face masks need to be worn tightly enough to create a seal around your nose and mouth. They use a replaceable filter to filter out the silica dust particles as you breathe.
It is also important to wear an FFP3 facemask, gloves and eye protection goggles when working with ash, as ash is caustic and can irritate your lungs, skin and eyes.
6 simple steps to making a pottery glaze from fallen leaves.
I use this ash glazing recipe when making a pottery glaze from fallen leaves:
40 parts - Cornish Stone (powdered from a pottery supplier)
40 parts - Sieved Leaf Ash (you can also use any plant-based ash such as wood ash).
20 parts - Quartz (powdered from a pottery supplier)
Step 1 - Collect, sort and dry the leaves.
The first step is to collect the leaves. I identify the plant first, so I know it is safe to collect. Small animals such as slugs, snails, insects and worms can be easily accidentally collected at this point, so I check each leaf before collecting.
I sort the leaves at this point in case I’ve accidentally collected any leaves or from a different plant along with the ones I wanted. It is easier to sort leaves out when they have been freshly collected because they are more difficult to identify once they have dried. This is also a great time to double-check for any invertebrates that may have accidentally been collected with the leaves.
Once the leaves have been sorted, I write down what the leaves are on a small piece of paper and add this to the pile of leaves to remind me what plant they are from.
Leaves will start to decompose if they stay wet. Dry leaves either inside or in a sheltered outbuilding like a shed.
I spread the leaves out on sheets of newspaper so they can dry more easily. I often dry leaves for a few months before burning to ensure they are really dry.
Step 2 - Burn the leaves and collect the ash
I always burn leaves outside on a still, dry day to prevent the fine ash from blowing away.
Leaves burn vigorously so it is important to burn them in a suitable fire-proof container. I use a 15 litre stainless steel garden incinerator which is specifically designed for burning garden material, and stand it on a kiln shelf as a fire-proof surface.
Fires should always be burned outdoors, so full combustion can occur to minimise the smoke and carbon monoxide produced. Some leaves also produce toxic smoke when burned, marine vegetation for example, so avoid breathing in the smoke.
I wait until the ashes have completely cooled before storing them in a lidded container. Hot ashes can smash a glass jar or melt a plastic one. Any ash that has fallen onto the fire-proof surface during the fire can also be scooped into the container.
I then label the container, so I don't forget what ash is inside (ashes often look very similar!).
Step 3 - Sieve the dry ash
I use a silicone spatula to brush the ash through the sieve into a bowl below. It is important to wear an FFP3 face mask to protect your lungs when sieving ash. It is also a good idea to use eye protection glasses to prevent the ash from irritating your eyes.
It can be helpful to sieve the ash using a 60-mesh size sieve first to remove any large pieces of unburnt leaf. I then sieve the ash through a 100-mesh size metal sieve which I bought online. Sieving through a 100-mesh sieve can take a while, but it is worth it because the resulting glaze will be very smooth and apply better to bisque-ware pottery.
Once the ash has been sieved through the 100-mesh sieve it is ready to be made into a glaze!
Step 4 - Weigh out the dry ingredients
Use the parts in the recipe to determine how much to weigh out. I weigh my ash first because this is the ingredient I usually have the least of. I then calculate the other ingredients in relation to this quantity. For example, if I have 444g of ash, I weigh out 444g of Cornish Stone, and 222g of Quartz.
Step 5 - Mix with water
Add enough water to make the glaze into the consistency of single cream. Ash glazes often work best if they are applied to a pot slightly more thickly than other glazes. However, sometimes the only way to know how thick a pottery glaze needs to be is to fire it, and see how it looks at different thicknesses.
Don’t worry if you add too much water when you are making a pottery glaze. You can easily fix this by letting the glaze settle and scooping excess water off the top of the container.
Step 6 - Sieve the glaze again
To ensure all the glaze ingredients are properly mixed, pass the glaze through the 100-mesh sieve, pushing it through the sieve using a silicone spatula.
Alternatively, the glaze can be blended using a catering electric stick blender to get a really smooth glaze. This is a great option when making larger quantities of glaze instead of sieving it all.
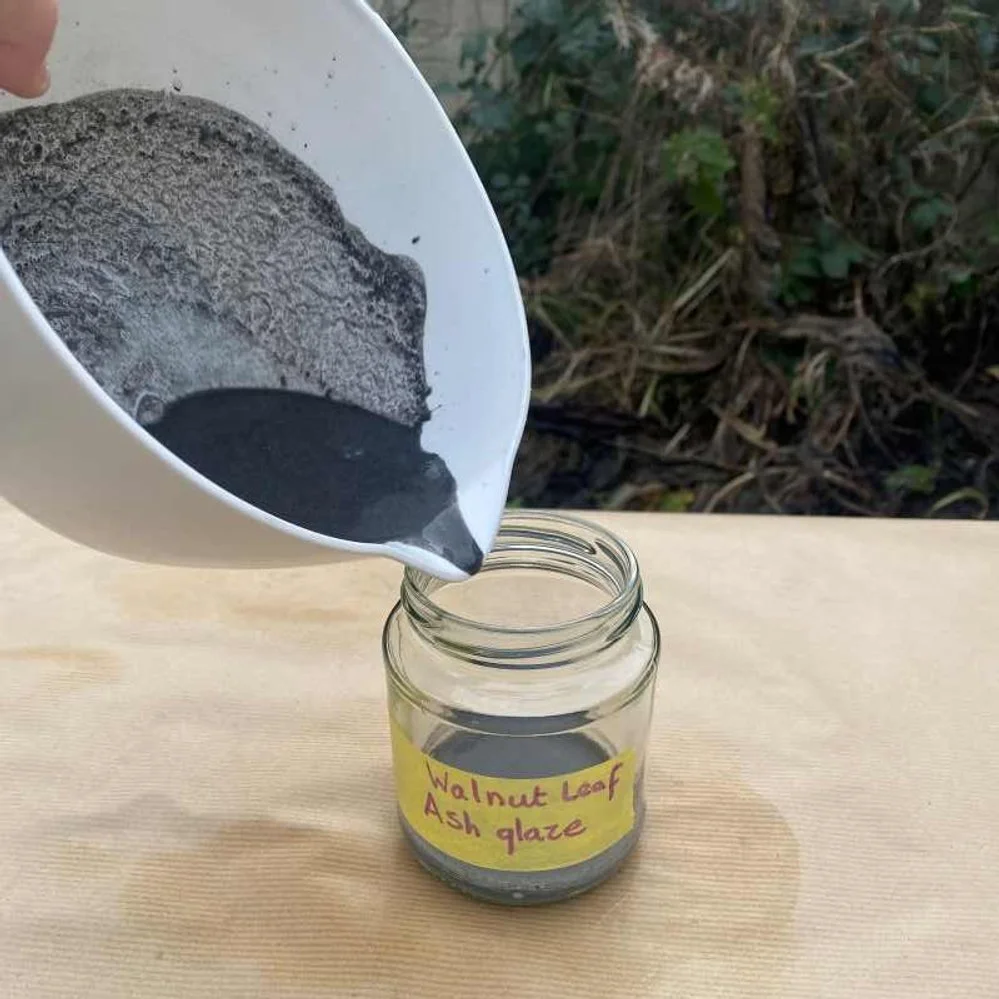
Your leaf ash glaze is now ready to use!
How to fire an ash glaze in pottery
Ash glazes can be fired in a regular stoneware temperature or ‘high-fire’ glaze firing. Get a free electric kiln firing guide here, which will show you the exact kiln firing schedule you need to fire your pottery in a bisque firing and a stoneware glaze firing!
Get a full guide to glazing with fallen leaves in this ebook

Ash glazing references
Leach, B. (1945) A potter’s book. 2d ed. London: Faber and Faber.
Pleydell-Bouverie, K. (1924) Working recipe notebook 1924 - 1970’s. Farnham: Crafts Study Centre, University for the Creative Arts.
Rogers, P. (1991) Ash glazes. London: A & C Black.
Sutherland, B. (2005) Glazes from natural sources: a working handbook for potters. 2nd. ed. London: A & C Black.